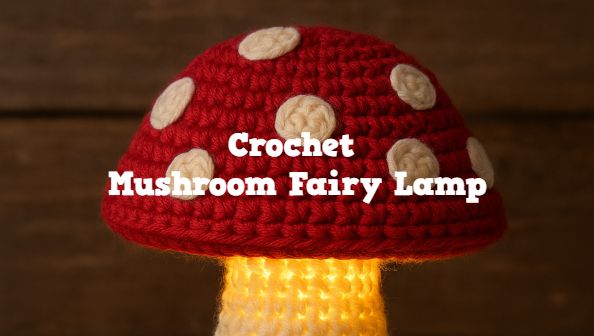
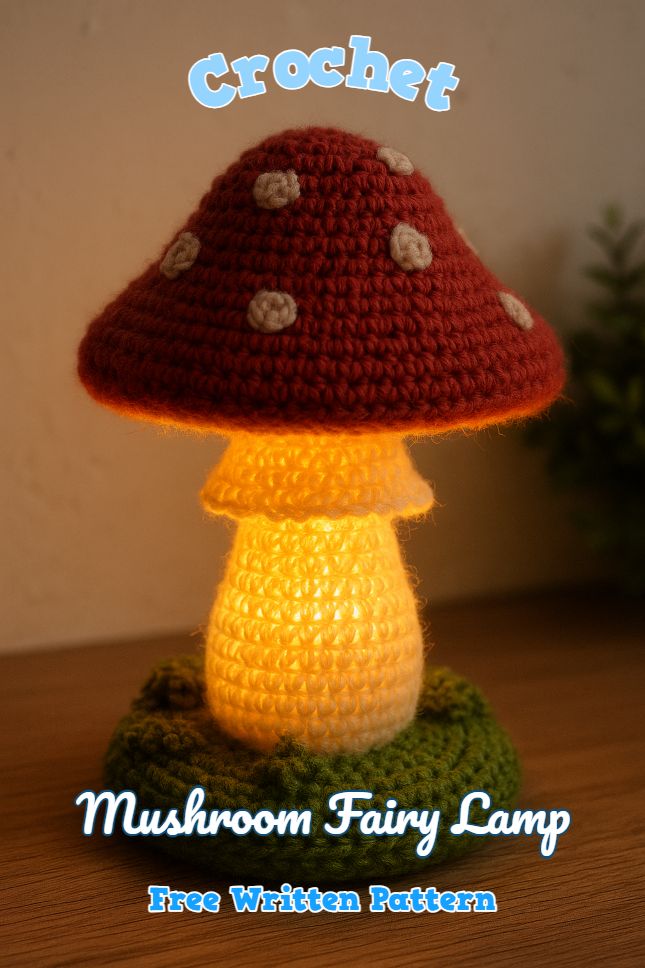
Just look at this beautiful and amazing creation we have here today for you. Imagine how happy your kids will be when they see this mushroom fairy lamp in their bedrooms. We hope you have some free time to sit and start crocheting right now. Good luck, and we hope you will enjoy. Don’t be afraid if you are a beginner, in our written pattern, which is free, you can step-by-step learn how to crochet this mushroom fairy lamp.
? Materials
Yarn: Red (cap), Cream/white (stem), Green (base), Small amount of beige (spots). Hook: 3.5�4.0 mm Stuffing: Polyester fiberfill LED light: Battery or USB fairy light (avoid heat-producing bulbs) Tapestry needle, scissors
? Base
(Green �Mossy� Circle) Round 1: Magic ring, 6 sc � 6 sts Round 2: inc in each st � 12 sts Round 3: (sc, inc) �6 � 18 sts Round 4: (2 sc, inc) �6 � 24 sts Round 5: (3 sc, inc) �6 � 30 sts Round 6: (4 sc, inc) �6 � 36 sts Round 7: (5 sc, inc) �6 � 42 sts Round 8�10: sc around (to make thickness) ? Fasten off, weave in ends. (Optional: crochet a few uneven bumps or use a fuzzy yarn to mimic moss.)
? Stem
(Cream Yarn) Round 1: Magic ring, 6 sc � 6 sts Round 2: inc each st � 12 sts Round 3: (sc, inc) �6 � 18 sts Round 4�10: sc around � 18 sts Round 11: (2 sc, dec) �4, sc last 2 � 14 sts Round 12�16: sc around � 14 sts Stuff lightly as you go (leave hollow center for light). Do not close � this is where the cap attaches.
? Cap
(Red Yarn) Round 1: Magic ring, 6 sc � 6 sts Round 2: inc each st � 12 sts Round 3: (sc, inc) �6 � 18 sts Round 4: (2 sc, inc) �6 � 24 sts Round 5: (3 sc, inc) �6 � 30 sts Round 6: (4 sc, inc) �6 � 36 sts Round 7: (5 sc, inc) �6 � 42 sts Round 8: (6 sc, inc) �6 � 48 sts Round 9�12: sc around � 48 sts Round 13: (6 sc, dec) �6 � 42 sts Round 14: (5 sc, dec) �6 � 36 sts Fasten off, leaving long tail to sew. Sew or crochet the cap onto the stem�s top edge.
? Spots
(Beige Yarn) Make 6�8 small circles: Round 1: Magic ring, 6 sc, sl st to join. Attach randomly around the red cap.
? Assembly:
Insert the LED fairy light through the stem opening. Secure the light wire underneath the green base (you can sew a cover). Make sure the light bulb sits in the stem and illuminates the cap evenly.
Optionally, glue or stitch the base to the stem for stability.
We hope you will enjoy crafting, and with the result, you will be happy.
Good luck!